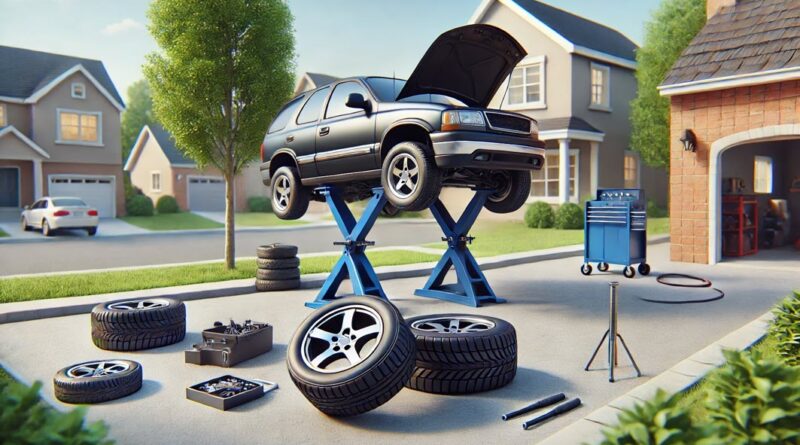
How to Rotate Your Tires at Home (If You’ve Never Done It Before)
Estimated reading time: 13 minutes
If you’ve never rotated a set of tyres before, I understand why the job can look more complicated than it actually is.
As a vehicle inspector, I spend plenty of time looking at tyres. They tell you much more about a car than simply how many millimetres of tread remain. Uneven shoulders, feathering, abnormal wear patterns and differences between front and rear tyres can provide useful clues about how a vehicle has been driven and maintained.
Tyre rotation is one of the simpler maintenance jobs you can potentially do yourself, but there is an important condition: you need the right equipment and must be confident that you can lift and support the vehicle safely.
This isn’t a job where improvisation is acceptable.
A proper jack, axle stands, wheel chocks and a torque wrench are far more important than finishing the job quickly.
Done correctly, tyre rotation can encourage more even wear and potentially help you get better service life from a set of tyres. Michelin currently recommends following the vehicle manufacturer’s rotation pattern and gives approximately 8,000 to 10,000 kilometres as a general interval. Goodyear UK suggests roughly 6,000 miles for cars and 4,000 miles for 4x4s unless the vehicle manufacturer specifies otherwise.
But before reaching for the jack, there’s something more important to establish.
Your tyres might not be suitable for conventional rotation at all.
What Does Rotating Your Tyres Actually Mean?
Tyre rotation means changing the position of tyres around the vehicle.
You aren’t physically turning a tyre around on its wheel. You’re moving complete wheel-and-tyre assemblies from one position on the car to another.
Depending on the vehicle and tyres, that could mean:
- Front to rear
- Rear to front
- Crossing tyres diagonally
- Front to rear while remaining on the same side
Why bother?
Because tyres don’t necessarily wear evenly.
On a typical front-wheel-drive car, the front tyres have several jobs. They steer the vehicle, transmit engine torque to the road and handle a significant proportion of braking forces.
Weight distribution, road conditions, alignment and driving style also influence tyre wear.
Michelin specifically identifies factors including drive axle, engine position, braking and wheel alignment as contributors to different rates of tyre wear.
Rotation aims to distribute some of this wear across the complete set rather than allowing one pair to become worn substantially earlier.
How Often Should You Rotate Your Tyres?
There isn’t one universal mileage interval for every car.
Your owner’s handbook should take priority.
As a general reference, Michelin recommends rotation at approximately 8,000 to 10,000 kilometres, while Goodyear UK gives approximately 6,000 miles for cars unless the manufacturer specifies something different.
Your driving conditions matter too.
Heavy loads, high mileages and demanding driving conditions can increase tyre wear.
The useful lesson isn’t to become obsessed with one exact number. Make tyre inspection part of your normal maintenance routine and follow your vehicle manufacturer’s instructions.
Before Starting: Check Whether Your Tyres Can Be Rotated
This is the step I wouldn’t skip.
Don’t assume that because a YouTube video shows someone swapping all four wheels diagonally, you should do the same.
First inspect the sidewalls and check the vehicle handbook.
Directional tyres
Directional tyres have a tread designed to rotate in a particular direction.
Look at the sidewall and you will normally see an arrow indicating the required direction of rotation.
If you’re moving complete wheels rather than removing tyres from their rims, directional tyres will generally remain on the same side of the vehicle and move between front and rear.
Don’t casually cross them from left to right.
Staggered tyre sizes
Performance cars and some other vehicles use wider tyres at the rear than at the front.
For example, a manufacturer might specify:
- 225/40 R18 front
- 255/35 R18 rear
You obviously cannot perform a conventional front-to-rear rotation with that arrangement.
Different wheel specifications
Even when tyres appear similar, front and rear wheels can have different widths or offsets.
Check before moving anything.
All-wheel-drive vehicles
AWD systems deserve particular attention because manufacturers can specify limits concerning tyre size, circumference and tread-depth differences.
Don’t automatically apply a generic internet rotation diagram to an AWD car.
Follow its handbook.
What You’ll Need to Rotate Your Tyres Safely
You don’t need a professional workshop, but I wouldn’t attempt this job without suitable equipment.
Ideally have:
- A suitable vehicle jack
- Properly rated axle stands
- Wheel chocks
- Wheel brace or breaker bar
- Correct wheel-nut socket
- Torque wrench
- Tyre-pressure gauge
- Tread-depth gauge
- Gloves
- Vehicle owner’s manual
Your handbook is particularly important because it identifies the correct jacking locations and should provide the wheel-fastener torque specification.
Never guess either.
A Jack Is Not a Substitute for Axle Stands
This deserves its own section because it is probably the biggest safety issue for a beginner.
A jack is primarily a lifting device.
Don’t assume that because it successfully raised the car, it is automatically a safe long-term support.
Once the vehicle has been raised, it should be supported correctly at manufacturer-approved points using equipment appropriately rated for the vehicle.
Never position yourself beneath a vehicle supported solely by a jack.
If you don’t own the correct equipment or aren’t confident identifying safe support points, pay a professional to rotate the tyres.
The money saved by doing it yourself isn’t worth taking unnecessary risks.
Step 1: Park on Firm, Level Ground
Start with the environment rather than the wheels.
You want a hard, flat and stable surface.
Avoid:
- Sloping driveways
- Loose gravel
- Soft ground
- Mud
- Uneven paving
Put an automatic vehicle in Park or a manual vehicle in gear as appropriate, apply the parking brake and use wheel chocks where required.
Also make sure you’ve got enough space to work safely around the vehicle.
Step 2: Check Each Tyre Before Moving Anything
I like doing this before rotation because it gives you a reference point.
Record which wheel is currently where:
- Nearside front
- Offside front
- Nearside rear
- Offside rear
Then inspect each tyre.
Look for:
- Cuts
- Cracking
- Bulges
- Embedded objects
- Uneven tread wear
- Low tread
- Sidewall damage
- Abnormal shoulder wear
UK government guidance says you’re responsible for ensuring your vehicle remains roadworthy even when it has a valid MOT. For most cars and light vans, tyre tread must be at least 1.6 mm across the central three-quarters of the tread and around the entire circumference. Tyres must also be correctly inflated and free from dangerous defects.
An MOT certificate doesn’t make tyre checks optional between tests.
Step 3: Loosen the Wheel Nuts Before Lifting
With the vehicle still firmly on the ground, loosen each wheel nut slightly.
Don’t remove them.
You’re simply breaking the initial tension so they will be easier to remove once the vehicle has been lifted.
Trying to release a stubborn fastener with the wheel hanging in the air can make the job unnecessarily awkward.
If a wheel nut refuses to move, don’t jump on the wheel brace or improvise with dangerous extensions. Excessively tight or damaged fasteners may require professional attention.
Step 4: Lift and Support the Vehicle Correctly
Find the manufacturer’s approved jacking point.
Don’t choose a piece of metal underneath the car simply because it looks strong enough.
Incorrect jacking can damage:
- Sills
- Underbody panels
- Suspension components
- Battery protection structures on some EVs
- Bodywork
Raise the vehicle and position the axle stand at an approved support location.
If you don’t understand the lifting instructions in the handbook, stop there and get professional assistance.
Step 5: Remove the Wheels and Have a Look Around
Once the vehicle is safely supported, remove the wheel fasteners and take off the wheels.
Now you have an opportunity that many drivers rarely get.
Look at what was hidden behind the wheel.
Without dismantling anything, you may be able to spot obvious concerns involving:
- Brake-disc condition
- Fluid contamination
- Damaged flexible hoses
- Broken springs
- Loose wheel-arch liners
- Corrosion
- Suspension damage
You’re not performing a full mechanical assessment, but obvious abnormalities shouldn’t be ignored.
If you find something you don’t understand, photograph it and ask a competent technician or inspector.
Step 6: Use the Correct Tyre Rotation Pattern
Here’s where many beginner guides become too simplistic.
The correct pattern depends on tyre design, drivetrain, wheel dimensions and manufacturer requirements.
For a conventional set of same-sized, non-directional tyres, common patterns include:
Front-wheel drive
A commonly recommended pattern moves the front wheels straight to the rear while the rear wheels cross to the opposite sides at the front.
For example:
- Front left → rear left
- Front right → rear right
- Rear left → front right
- Rear right → front left
Goodyear describes this pattern for suitable front-wheel-drive vehicles.
Rear-wheel drive
Common rotation patterns differ for rear-wheel-drive cars, typically involving the driven rear wheels moving forward and the fronts crossing as they move backwards.
Again, consult the handbook rather than treating a generic diagram as authoritative for every vehicle.
All-wheel drive
Some AWD vehicles use a cross pattern.
Others have manufacturer-specific requirements.
Follow the manufacturer’s instructions because AWD systems can be particularly sensitive to tyre differences.
Directional tyres
When wheels have directional tyres, they normally move front-to-rear while staying on the same side so that their direction of rotation isn’t reversed.
The handbook and tyre manufacturer’s instructions always take priority.
Step 7: Inspect the Wheel and Hub Contact Surfaces
Before refitting a wheel, have a quick look at the mating surfaces.
Heavy corrosion or debris can prevent a wheel from sitting correctly.
Don’t start coating wheel bolts, studs or mating surfaces with lubricants unless the vehicle manufacturer specifically instructs you to do so. Lubrication can alter the relationship between tightening torque and clamping force.
If you find heavy corrosion, damaged threads or anything else questionable, get professional advice.
Step 8: Refit the Wheels by Hand First
Place each wheel into its new position.
Start the wheel nuts or bolts by hand.
This matters.
If a fastener doesn’t thread smoothly, don’t immediately reach for an impact wrench. You want to avoid cross-threading.
Once all fasteners are properly started, lightly tighten them in an opposing or star sequence where appropriate so that the wheel seats evenly.
Final tightening comes later.
Step 9: Lower the Car and Use a Torque Wrench
Once the wheels are correctly positioned and lightly secured, lower the vehicle according to the correct procedure.
Now use a calibrated torque wrench to tighten the wheel fasteners to the manufacturer’s specified torque.
Not “very tight”.
Not “about what the garage did”.
Use the actual specification for the vehicle.
Overtightening can damage fasteners or threads and make later removal unnecessarily difficult. Undertightening creates an obvious safety risk.
This is why I consider a torque wrench essential equipment rather than an optional luxury for this job.
Step 10: Adjust Your Tyre Pressures
Moving a tyre from the rear to the front doesn’t necessarily mean its existing pressure is correct for its new location.
Some vehicles specify different front and rear pressures.
Check the pressure label, handbook or manufacturer’s information and adjust each tyre accordingly, preferably when the tyres are cold.
Government driving-test guidance similarly advises using the manufacturer’s recommended pressures and a reliable pressure gauge.
Don’t blindly inflate all four tyres to the same number.
Don’t Ignore the TPMS
Modern cars commonly use a tyre-pressure monitoring system.
Depending on the vehicle, moving wheels between positions may require a TPMS reset or relearn procedure so the vehicle correctly identifies each sensor’s new location.
Some vehicles handle this automatically. Others require a procedure through the infotainment system or diagnostic equipment.
Consult the handbook after rotating the tyres.
If a tyre-pressure warning remains illuminated, investigate it rather than assuming the rotation caused an irrelevant warning.
What Uneven Tyre Wear Can Tell an Inspector
This is where tyre rotation becomes particularly useful from an inspection perspective.
A tyre is effectively keeping a record of how it has interacted with the road.
If I see unusual wear, I don’t immediately think, “That needs rotating.”
I ask why it happened.
Wear concentrated on both shoulders can be associated with underinflation. Centre wear can sometimes relate to excessive inflation or operating conditions. Wear concentrated heavily on one edge can suggest alignment or suspension geometry problems.
Feathering, cupping or unusual repeated patterns can justify further investigation of alignment, dampers, wheel bearings or suspension components.
The important point is this:
Rotation redistributes normal wear. It doesn’t repair the fault causing abnormal wear.
If the front-left tyre is being destroyed because the wheel alignment is significantly wrong, moving that tyre to the rear doesn’t fix the alignment.
You’ve simply moved the evidence.
When Tyre Wear Should Lead to a Vehicle Inspection
If you’re buying a used car, tyre wear can provide useful clues about its maintenance history.
Four matching tyres with consistent wear can be reassuring. Four different budget tyres with wildly different tread depths and abnormal wear patterns tell a different story.
That doesn’t automatically make the vehicle bad, but it gives an inspector reasons to look more closely.
An independent vehicle inspection can assess tyres alongside steering, suspension, brakes and other mechanical components rather than treating each issue in isolation.
This is particularly useful when you’ve recently bought a used vehicle and discover unusual tyre wear shortly afterwards.
A proper car inspection can help establish whether you’re dealing with normal tyre wear or symptoms of a wider mechanical problem.
What If Two Tyres Are Much More Worn Than the Others?
Don’t assume the most worn tyres should simply be moved somewhere else.
If two tyres require replacement, tyre manufacturers including Michelin and Goodyear recommend fitting the new or least-worn pair to the rear axle, regardless of whether the vehicle is front- or rear-wheel drive, to improve stability.
This sometimes surprises owners of front-wheel-drive cars.
They assume the best tyres should automatically go on the driven wheels.
But maintaining rear-axle stability is important, particularly in wet conditions.
If your tyres are approaching replacement condition, get appropriate professional advice rather than using rotation to postpone the inevitable.
Common Tyre-Rotation Mistakes I Would Avoid
Most mistakes aren’t complicated mechanical failures. They’re shortcuts.
Common examples include:
- Using the wrong rotation pattern
- Crossing directional tyres
- Trying to rotate staggered wheels front-to-rear
- Ignoring manufacturer instructions
- Jacking against the wrong part of the car
- Relying solely on a jack
- Forgetting to adjust front and rear tyre pressures
- Tightening wheel nuts by feel
- Using an impact wrench for uncontrolled final tightening
- Ignoring TPMS requirements
- Treating abnormal wear as something rotation will cure
- Failing to inspect tyres while they’re off the vehicle
Taking another ten minutes is better than correcting a preventable mistake later.
When You Should Not Rotate Tyres Yourself
There is nothing wrong with deciding a DIY job isn’t appropriate.
I’d use a professional if:
- You don’t have axle stands
- You don’t have a suitable level working surface
- You cannot identify the jacking points
- Wheel fasteners are seized or damaged
- You have lost the locking-wheel-nut key
- The vehicle has unusual wheel or tyre specifications
- You’re uncertain about a staggered setup
- You suspect suspension or steering problems
- The vehicle is particularly heavy
- You’re simply uncomfortable lifting it
Good DIY maintenance includes knowing when not to DIY.
A Simple Tyre-Care Routine Between Rotations
Rotation is only one part of tyre maintenance.
Get into the habit of checking:
- Tyre pressures regularly
- Tread depth across each tyre
- Inner and outer shoulders
- Cuts and sidewall damage
- Bulges or deformation
- Embedded screws or nails
- Valve condition
- Uneven wear
- Changes in steering behaviour
Pay particular attention before long journeys.
Remember that 1.6 mm is the UK legal minimum for most cars and light vans, not a maintenance target to aim for.
If the steering suddenly begins pulling, vibrating or behaving differently, investigate the cause rather than waiting for the next planned tyre rotation.
Is Rotating Your Tyres at Home Worth Doing?
For the right vehicle and the right owner, yes.
It isn’t technically difficult, and it encourages you to pay closer attention to an area of the car that has a direct relationship with braking, steering and grip.
But saving the garage labour charge shouldn’t be your main objective.
The bigger benefit is becoming more familiar with your vehicle.
When you regularly look at the tyres, you start noticing changes. Perhaps one shoulder is wearing more quickly. Maybe one tyre repeatedly loses pressure. Perhaps you spot a damaged spring while the wheel is removed.
That’s useful information.
From an inspector’s perspective, early observation is one of the cheapest forms of preventative maintenance available.
Final Thoughts
Learning how to rotate your tyres at home is a useful maintenance skill, but the actual swapping of the wheels is the easy part.
The important parts happen around it.
Confirm that your tyres and wheels are suitable for rotation. Use the manufacturer’s recommended pattern. Lift the vehicle correctly. Support it securely. Inspect the tyres while they’re accessible. Adjust the pressures for their new positions and tighten the wheel fasteners to the correct torque specification.
Most importantly, look at what your tyres are telling you.
Normal differences in wear can be managed through appropriate rotation. Abnormal wear is different. It can be a warning that something else needs attention.
That’s when you stop rotating tyres and start investigating the vehicle.
A good inspector doesn’t just look at how much rubber remains.
We ask why it has worn that way in the first place. Read more articles.